|
Log in to Paycomonline.com |
|
 |
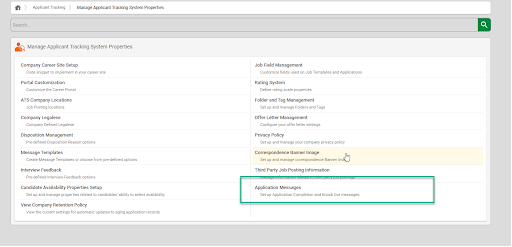
Select "Applicant Tracking" |
|
Select "Manage Applicant Tracking System Properties" |
|
|
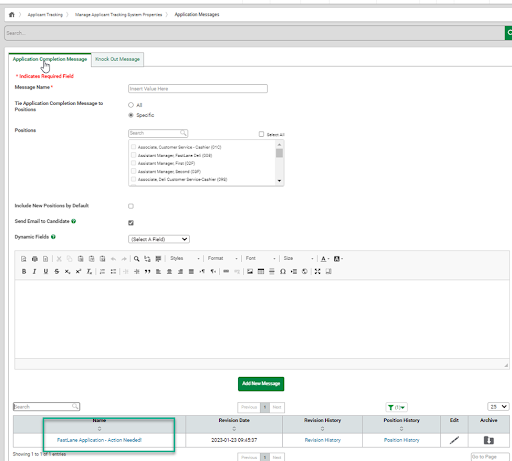
Select "Applicant Messages"
|
|
|
Enter Message Name |
|
|
Select "All" or "Specific" depending on your need. If you choose "Specific", you will need to select a position. |
|
|
Enter message template, we suggest the following language: We have received your job application! As part of the interview process, we ask that you please complete a brief, three-question survey. You can access the survey by clicking this link: [Insert Sprockets Link]. We really appreciate you taking the time to consider us in your job search. Please complete the survey, and we'll be reviewing the information you've provided us. Thank you! |
|
|
Click "Add New Message"
|
How to Export Past Applicant Data from Paycom
1. Accessing the Report Center
-
Locate the "Reports" option on the top toolbar and click on it. In the dropdown menu, select "Report Center".

2. Selecting the Applicant Tracking Report Writer
-
On the new page, find the "Report Writers" tab. Select the "Applicant Tracking Report Writer" option.

3. Choosing Specific Fields for the Export
-
Starting with "1. Applicant Tracking Specific Fields," you will choose the following fields to be included in the export:
-
First Name
-
Last Name
-
Email Address
-
Primary Phone Number
-
Job Location
-
Job Title
-
-
Once you have selected the necessary fields, click the "Next" button at the bottom of the screen.
4. Setting Filters
-
In the "2. Filters" section, you can select the date range for the export:
-
Under "Filter Type", select "By Date Filter". Click on "Relative Date Range".
-
Choose the desired date range. It is recommended to collect data as far back as possible.

-
-
After setting the date range, click the "Next" button at the bottom of the screen.
5. Bypassing Sorting Options
-
Once you are on the "3. Sorting Options" section, simply bypass this section by clicking the "Next" button at the bottom of the screen.
6. Reviewing and Generating the Report
- Proceed to the "4. Review" section to select the Output Format to be a "CSV" file, then click the "Generate Report" button at the bottom of the page.
Your report will be generated and available for download in CSV format, containing the selected applicant data fields within the specified date range.