i
Use this guide to understand how this integration supports your Sprockets workflow and what to confirm during setup.
Guide
How to Export Past Candidate Data from Paycom
1
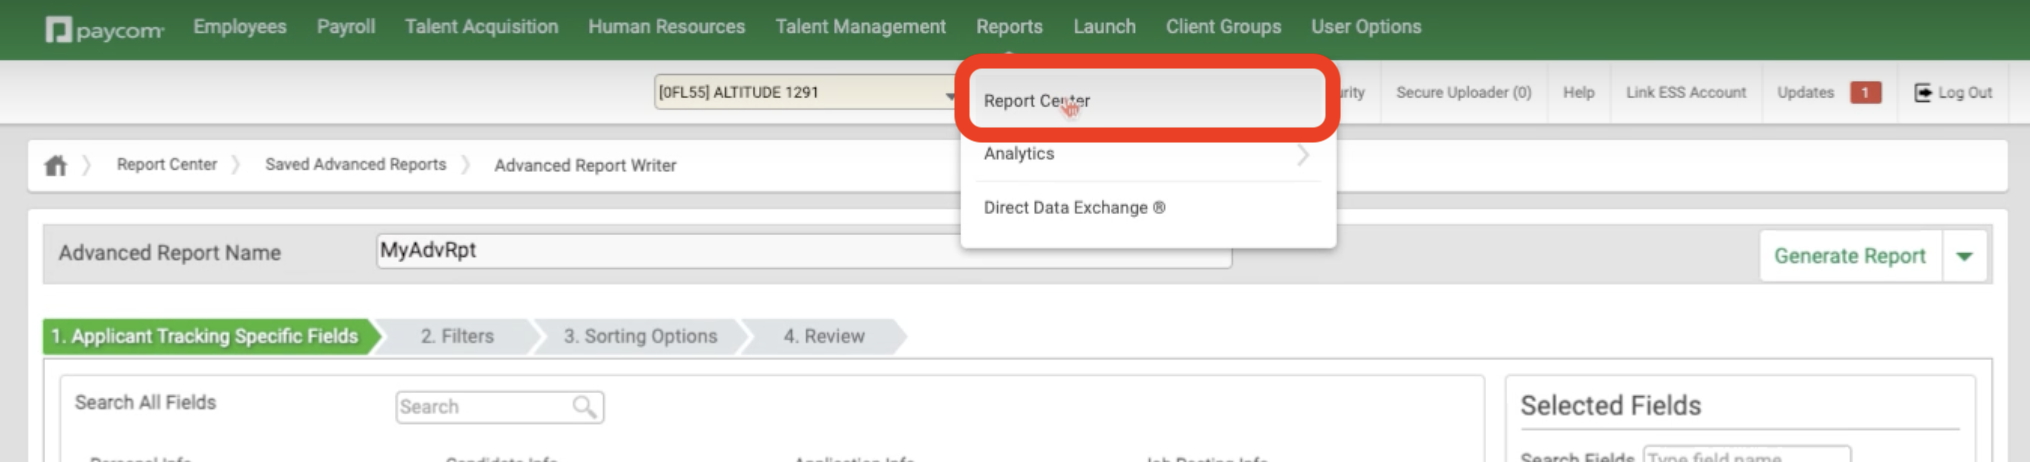
1. Accessing the Report Center
- ✓Locate the "Reports" option on the top toolbar and click on it. In the dropdown menu, select "Report Center".
2
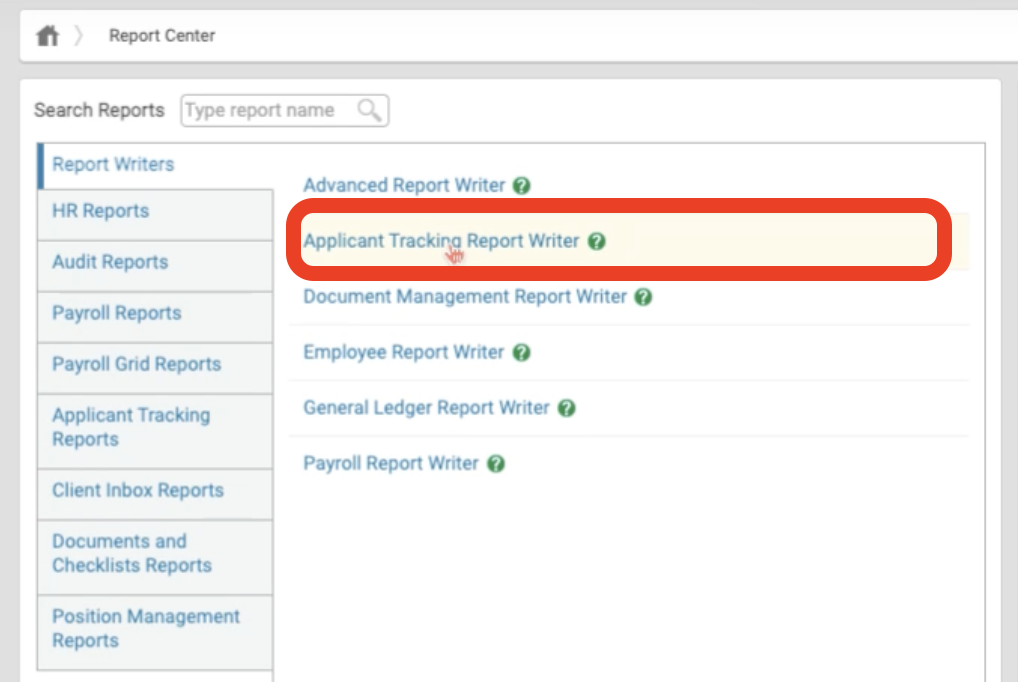
2. Selecting the Candidate Tracking Report Writer
- ✓On the new page, find the "Report Writers" tab. Select the "Candidate Tracking Report Writer" option.
3
3. Choosing Specific Fields for the Export
- ✓Starting with "1. Candidate Tracking Specific Fields," you will c hoose the following fields to be included in the export: First Name Last Name Email Address Primary Phone Number Job Location Job Title
- ✓Once you have selected the necessary fields, click the "Next" button at the bottom of the screen.
4
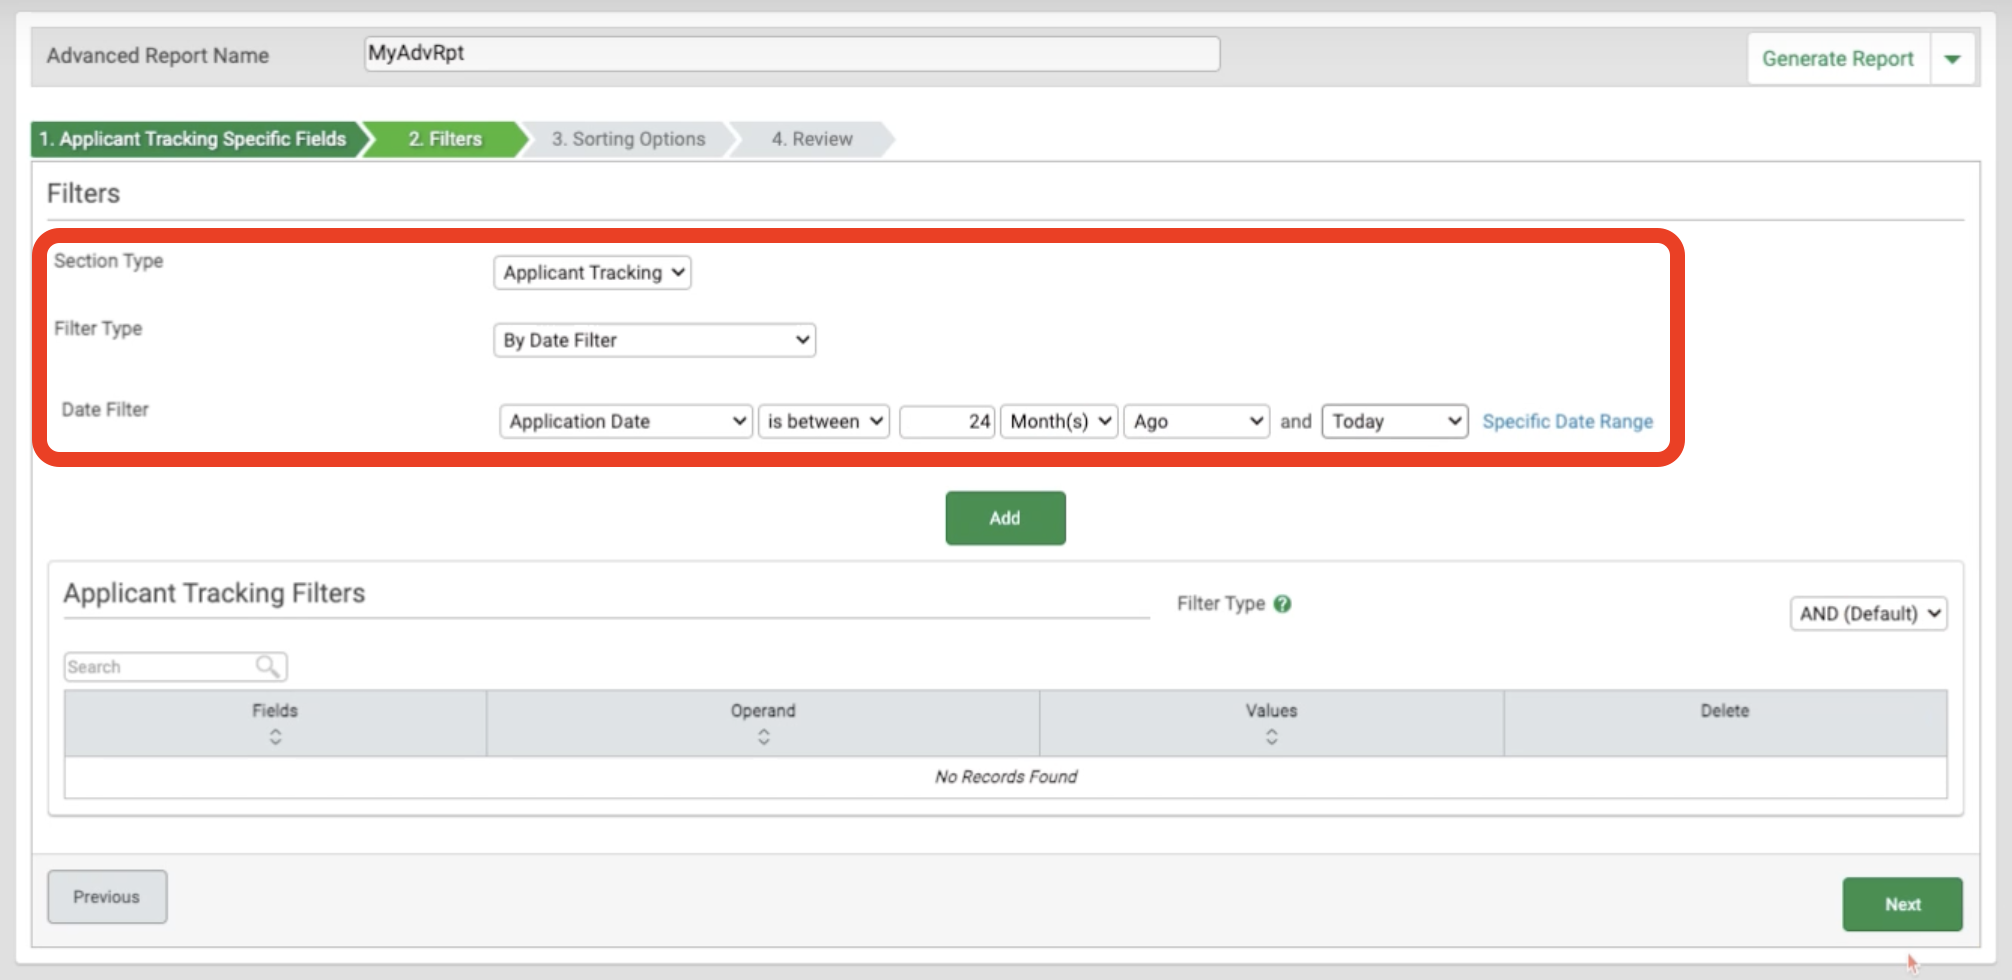
4. Setting Filters
- ✓In the "2. Filters" section, you can s elect the date range for the export: Under "Filter Type", select "By Date Filter". Click on "Relative Date Range". Choose the desired date range. It is recommended to collect data as far back as possible.
- ✓After setting the date range, click the "Next" button at the bottom of the screen.
5
5. Bypassing Sorting Options
- ✓Once you are on the "3. Sorting Options" section, simply bypass this section by clicking the "Next" button at the bottom of the screen.
6
6. Reviewing and Generating the Report
- ✓Proceed to the "4. Review" section to select the Output Format to be a "CSV" file, then c lick the "Generate Report" button at the bottom of the page.
Your report will be generated and available for download in CSV format, containing the selected candidate data fields within the specified date range.
Guide
Related Articles
- ✓Integrations Overview
- ✓How Sprockets Connects With Your Existing Systems
- ✓UKG Integration